
The next lesson went over how to save out different types of files. Saving your file from the document menu saves out an image of your model from a 2.5D perspective. Saving a tool saves the geometry of the model you just sculpted. Finally saving a file is good for when you have finished the model with all of its textures and extra tools.
Saving a Document (Image) File

Saving a Tool (Geometry of Model)

Saving a File (All Information for ZBrush Project)

In the next tutorial we went over the lots of the display options in the Transform Menu. Options like poly frame, transparent tool, ghost tool, and the expose option.


We then moved on to using the Move, Scale, and Rotate tools in various places.
The instructor showed that the position and rotation could be adjusted in the geometry panel (I couldn't find it in my version of ZBrush for some reason).

You can find the Move, Scale, and Rotate tools in the upper menu next to the edit and draw options.

You can also affect the rotation and size of your model from the Deformation menu.

In the next lesson we went over learning how to subdivide geometry along with how it could affect your workflow. When you start off with a base model it consists of its initial number of polygons, which may or may not (usually not) be perfect for sculpting on. That is where subdividing comes in. Every time you subdivide it break every polygon face into four faces. The more polys the model consists of the easier it is to sculpt and apply detail.
Playing around with a subdivided cube.

To subdivide your object make sure that it is a PolyMesh3D object first and then in your geometry option set click divide. You can remove and add subdivision level whenever you need to.

Now we finally move on to the fun stuff! Sculpting! The tutorial went over some of the basic sculpting tools and brushes. Here is a random blob I started to model! =D
(Pretty Scare Huh?)


Here are some of the brushes (it is quite large).

You can find the different brushes on the side left tool panel.

After that we went on to briefly go over poly painting. The painting portion of ZBrush was a little weird in the beginning, but I can see a lot of cool things that you could do with it with a little practice.
(Make sure that once you create an object, to put it in edit mode, and make it into a PolyMesh3D object. Then find a base color to start out with and go to "Color" and then select "Fill Object").

If you would like to paint solely with color make sure that Zadd and Zsub are turned off first.

Still playing around with the sculpting brushes, but this time adding some color in.


We learned about masks next and a little bit about how they can be integrated into your workflow.


In the next lesson we went through some of the effects that you can do when you mask out certain portions of the model and then use the deformation tools on the right of the screen.
(And here is a disturbing alien head for your viewing enjoyment!)


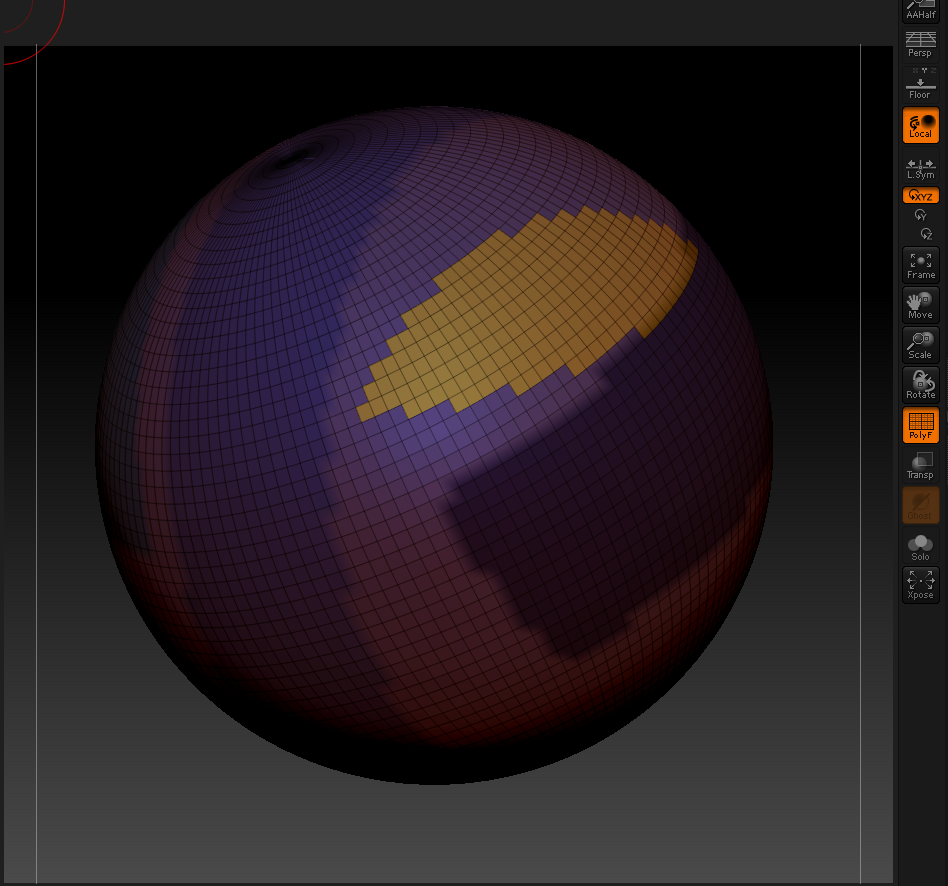
The following tutorial going over creating polygroups was a little confusing because you have to remember the hot keys in order to use the tools needed. If you want to select only a portion of your model to sculpt on you can hold "control + shift" and click and drag it over a the portion you want to isolate. THIS IS IMPORTANT --->> (Make sure that you click on the Poly Frame icon before you start making new polygroups; otherwise you won't be able to see them!).
Located on the right side next to the move, scale, and rotate icons.


And then if you "control + shift" click on the hidden portion of the geometry it will reveal the hidden portion and then hide the previously reveal part of the model.

In this way you can sculpt only portions of the model you really want to affect and not have to worry about effecting the hidden parts.
If you want to reveal the entire object again. Just again "control + shift" click on an empty portion of the canvas.
Then if you want to make one of the selected isolated parts into a group that you can go into the "polygroups" sub-menu and click on "GroupsVisible".


This could help one sculpt fine detail and I see how it could be helpful.
The instructor next went over some of the basics of adding materials.
There is a materials sub menu located on the left side of the program or you can access from the top menu set be selecting "Material".

If after you have loaded a material and filled the object with that color you wish to go back and reset your materials go to the SubTool Master and select "Fill" and then make sure that non of the check marked options are checked. For that lesson he took a sphere and just clicked through a couple materials; nothing too fancy.

Working with texture maps came next. He went over various things. If there is a certain image that you would like import to use as a texture you can click on "Texture" menu above and import the image file.

You can also go to the "Texture Map" menu set and create various forms of texture maps.

Texture cans be used to paint on your models as well and can be changed into a paintable format be selecting you texture/textured object and going to the Polypaint sub menu (to the right) and clicking on Polypaint From Texture.

If you later want to turn that texture into a UV map first go to your objects subdivision levels and make sure that it is set to the lower level. Then go to the "UV Map" menu set (on the right) and select the type of UV map you want to turn the texture into (while he did many of these actions he made sure that the texture was applied to his object first). For that tutorial Justin choose the "PUVTiles" option.

The next lesson was fun. We went over some of the capabilities of ZSpheres.
You can find ZSpheres in the tools panel where you would normally select a standard shape

To see preview what it the ZSpheres will look like when they are converted to a mesh press "a"

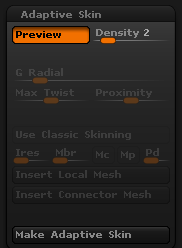
You can tweak things like "Density"(amount of subdivisions) in the "Adaptive Skin" menu set located inside of the tools panel on the right and then when you want to make it into a mesh ready for sculpting click "Make Adaptive Skin"
You can then go into the "Brush" panel and choose something like "Move" to push and pull you geometry out into various shapes

In the following lesson we went over working with Subtools.
You can add more tools to the list by clicking on "Append" and then selecting another tool.

Next we got to work with the "ShadowBox" tool located in the "Geometry" menu. This is a pretty nifty little tool that could be used in various ways and would probably work best using "tablet and pen" for better accuracy.
Select an object like a star or sphere and then click "ShadowBox". A three sided wall like structure should appear with the shape inside. Using the masks (either drawing a square, circle, or using the pen mask tools) you can draw out shapes on the walls of the shadow box to affect the geometry within. You can make a mask by pressing "control" and painting or drawing out a shape onto a surface.
Location of ShadowBox

Clicking on ShadowBox with a Standard Shape Created (First)

Adding to the pre-existing mask by drawing a mask on the walls


ShadowBox adding geometry to the star shape tool

If you want to start out with a blank slate and just draw your own custom shape then:
1. Create a standard shape
2. Click on ShadowBox
3. "Control + Alt" click a box around the whole ShadowBox
4. "Control" click (mask using the pen, circle, square, etc. mask tools)

A Wacky Shape I created with ShadowBox


I was first thinking, "Why is the instructor going in a direction that isn't continuing to add to the worm?". Don't worry, he does use it, just at the very end of the lesson.
At the end he used the ShadowBox tool and a cylinder shape to make the screw shape. He both added mask and subtracted from the mask using "Control + Alt" click to make a shape. This was very helpful -->> Before you release from your click while you are making a mask shape (or subtracting) hold "Space Bar" to click and drag the shape to be able to place it exactly where you want it.
Here is the screw I created.

We moved on to using the DynaMesh tool located in the "Geometry" menu. Make a shape, making sure that you convert it into a PolyMesh3D object, you can use brushes to add or subtract geometry to the shape. When you want it to combine into one object you can then "Control" click off of the object onto your perspective view two times to have the objects smoothly combine. To subtract the object from the mesh just hold "alt" while you are adding geometry to your object and then after you "control" click and drag off the object a few times then it will delete the object you drew on it.


If you want to hollow out the shape you can always subtract the object from the mesh (previous explanation) and then "control" click and drag once in the perspective view and then click on "Create Shell"; specify how thick you want the hollowed out walls to be by adjusting the "Thickness" option.

Random shapes made using DynaMesh options and shapes


The next tutorial talked about Inserting Mesh Techniques. First pick the "MeshInsert Dot" tool from the "Brush" options (If you know which brush you are searching for you can always type the first letter of it to narrow it down further; it acts as a search).

Then to select a specific shape go to the "Brush" menu at the very top of the application and click "Modifiers" and "MeshInsert Preview" to choose a shape.

You can also mess around with how far you want the object to be inserted into the object by adjusting the "Depth" parameter; also located in the "Brush" menu.

We then used this to use the screw shape tool we built and drag it onto another surface (practiced on a sphere). I am guessing that further on in the lessons we will be putting it on the metal grating platform that the worms is sitting on.


The "Remeshing Geometry" lesson was a useful one to watch. If there is a mesh that you want to rebuild with a different poly count, first draw your tool (shape) and then go into the "qRemesher" located right under the "DynaMesh" option. The number associated with the "Target Polygons Count" is the adjusted number multiplied by 1,000. So if it says 15 that means that it will rebuild your object into one with 15,000 polygons. Once you have adjusted the "Target Polygons Count" or selected one of the other options click "QRemesher".


Remeshed Object

You can also use the "QRemesherGuides" brush to help shape how the polygons will build your object (an approximation on how your edgeloops will look)

Click "QRemesher" again to complete the action

If you want to add or subtract objects from your mesh you can always go to the "Remesh" option located in the "Subtools" menu.
Remesh options' set

A group of objects in your perspective view and Subtool panel

If you have the "layer" with your model set too the first option it will add them together if you click the second moon-shaped icon it will subtract from the other meshes.
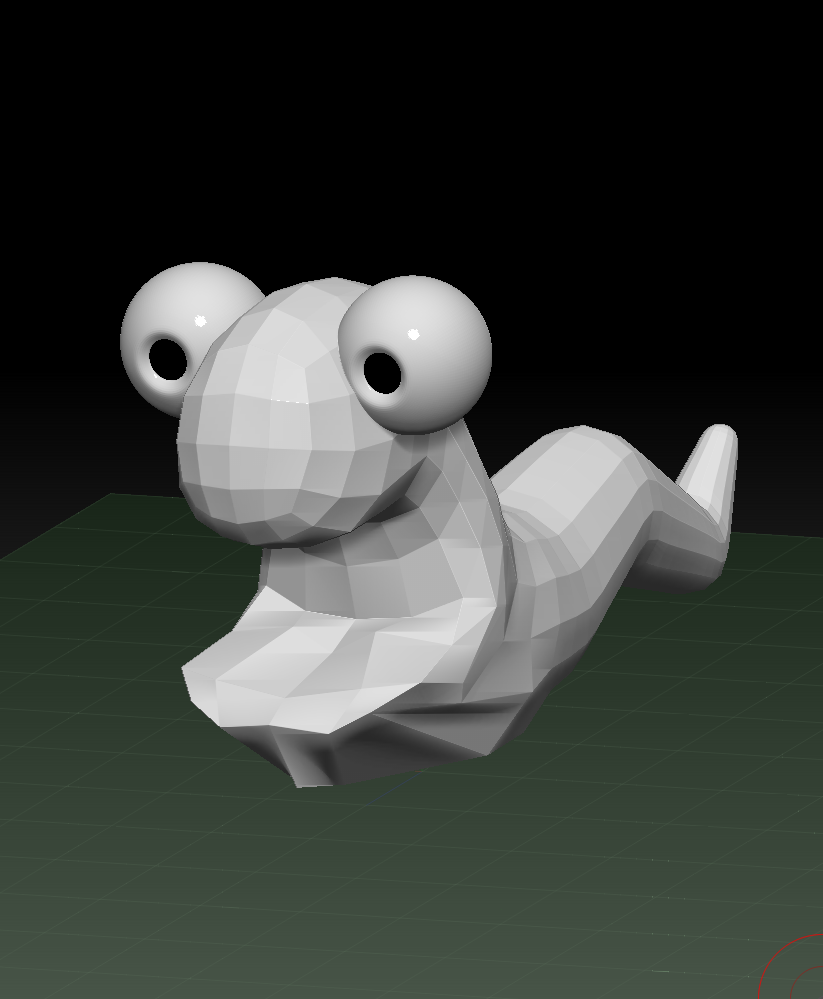
Using Remesh I combined couple of my modeled objects and created this!


I added in some eyes (behold my Slug Mech!)

Your result may vary based on how high you set your resolution so experiment with it.
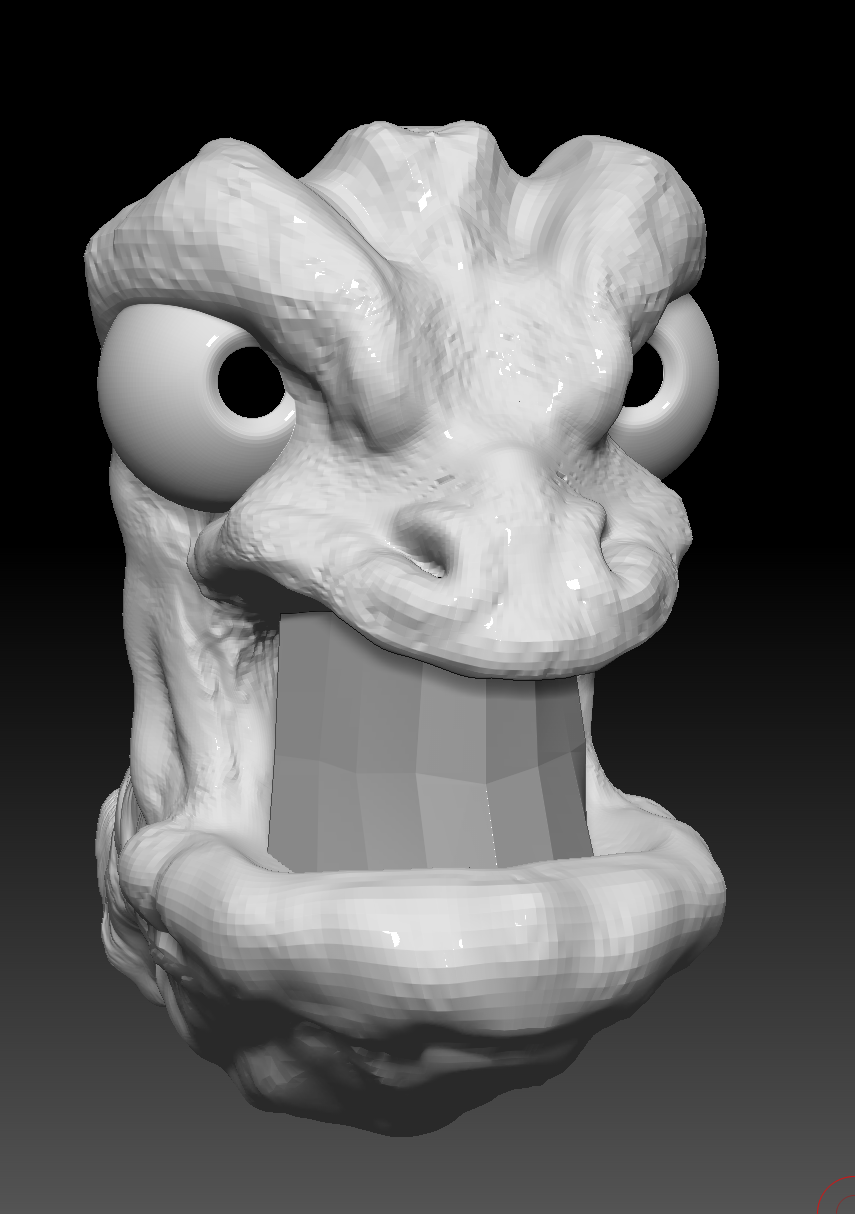
We then learned how to take a base mesh and then using another model project the detail onto the mesh. This could be good if you want to adjust the polygon count your model has and then try to project the detail that you modeled on it later.
Project options' set

First remesh your detailed object to the desired amount of polygons.

Then select only the layers of detail that you want to be added to it and click "ProjectAll". You will get different results based off of the "Dist" option so play around with it (the instructor didn't mess with any of the other options so I am not sure what they do).


My projection didn't come out perfectly so I tried to smooth it out a bit. This tool seems useful, but it didn't really work for me.

(Well ladies and gentlemen, this project is my final which is due tomorrow; it's time to speed things up!) The next project went briefly over "Hard surface modeling". In this lesson we started to model the platform that the worm will be on.
This was created using a series of polygroups and edgeloops for extruding

This was created by setting transform to symmetry and creating a mask to make the curve shaped grooves

You can find the edgeloops tool in the Geometry panel

The next lesson was almost a complete failure. I went through all the trouble to follow along with his steps and then he goes to use the "Group by Normals" and the "Panel Loops" tools. ZBrush 4R4 doesn't have either of those tools.


Their tools (ZBrush 4R5)

My tools (ZBrush 4R4)

Because I didn't have the "Group by Normals" I had to group them all individually (took awhile).

I was able to continue. But then he goes to bevel the individual teeth and add thickness to them by using the "Panel Loops" tool. I can't find a substitute for making them look like his.
Their tools (ZBrush 4R5)

My tools (ZBrush 4R4)

I have decided to move on and do as much as I can. (And yet my worm is still smiling).

The following lesson went through the "Typology" tool. He was mentioning that it would be nice for creating clothes for characters, but I found another use for it haha. Here are a couple screenshots to explain what I mean.
You can find the Typology "Brush" in the brush menu set

Since I didn't have the "Panel Loops" tool I decided to try using the "Typology" tool instead. It worked; to an extent, but I was not able to bevel the edges or separate the teeth like he did. I separated the individual teeth into polygroups so hopefully that will be all I need in order to paint them later.
Drawing a series of intersecting line using the "Typology" tool

The thickness of the grid shape is determined by the "Draw Size"

Separating the teeth into polygroups

Alright, time to move on to the next lesson, "Advanced Sculpting Concepts". This one was actually kind of fun to do. I got to experiment with a whole bunch of brushes. Here is what the worm looks like now.


Behold the Dragon Worm!
The following tutorial went over using noise to get some interesting effects on your model. The noise effect is located under the "Surface" menu in the "Tools" option set. When you click on noise it brings up the noise editor.
Location of Noise Editor

Mini Noise Editor That Comes up

Model with Noise Applied

After that we started painting! He decided to paint his certain colors and then encouraged us to do the same. So I did. First off, here is what the instructors looks like so far. It still looks pretty cool, but my paint job is way different haha.
Instructor's Worm

My Worm!


Dragon Worm says: "I will eat you all! Muahahahahahahahahaaa!"

After that the instructor showed some of the capabilities of the built in tool called "Spotlight". It was pretty cool. You load in a image with a certain texture and then you can the image accurately onto any surface. The only problem was it was freezing the computer so badly that I couldn't use it. So I just painted it really simply and moved on.
My model was so shocked that "Spotlight" didn't work that it lost its skin

You can load texture into spotlight via the "Textures" menu at the top of the screen.

Simple Paint Job

The next tutorial went over ZBrush's capabilities with the ZPlugin: "Transpose Master". He also show in the beginning how you could adjust your character by masking off certain portions of it and rotating, scaling, etc.
Some of the Options of the Transpose Master
Because I was having trouble with masking and rotating the worm's body, I decided to leave it alone and mess with it in the future
We moved on to briefly learning a little bit more about "Layers". The "Layers" menu is right underneath the "Geometry" menu set in the "Tools" panel. What is cool is while the layer is set to "REC" it records any changes you make to your scene. When you click off "REC" you can dial it down to change how intense you want the results to be (1 being the highest and -1 being the lowest).
Create a layer by clicking on the square icon with the plus mark

Yes my worm has horns now (at least in the layers panel)


The next tutorial went over Fiber Mesh! Fiber Mesh can be used to create hair or fur on your object. There are even 4-5 brushes that help you adjust any hair you paint on your object. You paint masks where you want hair and then you can preview it. The "Fiber Mesh" option set is located right underneath the "Layers" option set.
Multiple Grooming Brushes in "Brush" menu set

Fiber Mesh option set located right under the Layers option set

Gorilla Dragon Worm!

My worm needs a haircut

Why the worm has massive amounts of noise hair beats me (I had this all on a layer)

The following tutorial talked about the "Morph Target" option. Morph target is almost like a layer in its own aspect. With a mesh select you can make it a morph target in the the "Morph Target" options set and then sculpt on your model changing the parameters of the option to get varying results. You can then hide it by clicking "Switch" and then if you want to reveal some of the little detail that you sculpted using morph target select the "Morph" brush and paint in the areas where you sculpted the hidden details. The higher your draw size is, the more of the hidden detail will be revealed.
Morph Target Menu

Area with hidden sculpted geometry

It is hard to see, but there are some small extra scaly surfaces that rise up from the worm's back.

I was able to watch most of the videos, but since I was running out of time I decided to start messing around with rendering and lighting. I still have much to learn, but here are the renders I got. (Final Renders for now).


